You need to cut a hole pretty much the exact shape of the outside of the mast. That hole needs to be dead center over the top the keelson. It needs to be in line with the centerline of the boat. It needs to hold the mast perpendicular to the keelson. It should probably be centered in the deck slot for the mast. That is a lot to ask from what seems a simple hole in a board. Here is the idea I stared with:
 |
The spacers on top of the board are to provide clearance for the deck.
The edges of the deck have a lip.
|
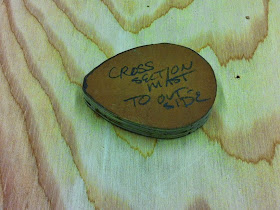
To copy the shape of the mast's outside, just get a piece of nice plywood and trace around the mast. Cut outside the line; then file and sand to final size. I happened to have a little piece of MDO scrap laying around. This tear-drop shaped piece fits the outside nicely.
 |
Not perfect like the plugs, but pretty close.
|
Then you take this pattern and screw it down to a board that will be the template for cutting the hole. I kept using my little scraps of 1/2- inch MDO. Then you get a router with an up-cut spiral cutting bit and put it in a router that has a pattern cutting sleeve. Like this:
 |
I used more scraps of MDO to support the router so it didn't tip on the
pattern. A small trim router works best on this kind of pattern.
|
Now you end up with a hole in the MDO. That is the pattern you will use to cut the hole in the deck brace. You will have to change to a bigger guide (wider in diameter) and experiment until the hole you cut is just the right size. It took me three tries. I ended up adding foil tape around the guide until it produced a hole that was a tight fit. You need patience for this part of the job.
 |
| You can seem some of the test cuts under the actual board. |
The final result from four or five hours of messing about was a hole that met all the requirements.
 |
Pretty nice fit. Certainly more snug than the deck slot
made by Tanzer.
|
Next: Adding the spacers and mounting the brace under the deck.
Today's Cliche: There are stupid questions. They are asked by stupid people at the end of long, stupid meetings. Stupid bosses attempt to answer them.
No comments:
Post a Comment